Easter Decorating for a Christ- Centered Easter

Wednesday, April 1, 2015


I have been scouring Pinterest for MONTHS trying to find inspiration for Christ-centered Easter décor.  It is super hard to find! Everything out there is about involving kids in Easter and how to teach them the real meaning. There was nothing that works before kids.  I think during Easter we do need a reminder (especially adults) of what this season is about. We can get caught up in the super cute plates, bunnies and Easter egg topiaries (me, that’s me) that we forget! 

So y’all, the other day when I was trying one more time before I really had to have my Easter décor up, I stumbled upon The Small Seed and a series they have called Traditions of Faith.  Basically they talk about real family traditions they have during each holiday that incorporate God and remind us of the real meaning.  For Easter, one of the writers wrote about an Easter Tree [click here to see the post].  It was absolutely perfect!  It is a tree that you decorate with ornaments, scripture and words that remind us of Christ. The words take us through his whole life, ending with his death and then resurrection. On the blog, they set it up to involve children. They have them hunt for an Easter egg containing an ornament with an accompanying scripture each day of the week leading up to Easter.  The kids find the egg and then the family sits down to talk about that part of His life. It is super cool and so easy!  Below are pictures of how I used their super precious idea and a couple other Easter decorations I put up. 


Here is the strip of paper with the bible verse on it.
The "He is Risen" sign from The Small Seed and and amazingly fragrant Easter Lilly  from a boutique flower shop a few doors down from our house.
Here's the whole set up. Sorry for the poor light (and the crooked lampshade)
 
This "Happy Easter" banner is from Target!  It was only around $7!!  Super cute and super easy!


Wedding Weekend: Girls getting ready

Wednesday, March 25, 2015


The day of the wedding the girls were up and at 'em by 10 am. I, however, was up at 7 because it felt like Christmas morning for some reason and I couldn't fall back asleep.  It was a very strange feeling! Everyone got ready at my parents' house so we didn't have very far to go.  Mom made us a wonderful breakfast of egg casserole, grits and fruit and it was the most yummy!  Seriously though, this along with an easy-to-eat lunch, was definitely key to setting the day and night off right.  Since we were all probably (maybe, possibly) going to be drinking a bit the rest of the day and not have much other time to eat, it was key to take advantage of the slow time in the morning to eat what we could.

So we started with breakfast and coffee and before long everyone who wasn't able to spend the night started showing up. The makeup artist and hair stylist arrived a little later and we all got to work!  We had music playing, everyone was chatting and getting ready.  It was such a wonderful time to get to spend with just the girls.

Everyone kept asking me if I was nervous and I really wasn’t.  You know the feeling you get on Christmas morning right when you wake up and you remember it’s FINALLY Christmas morning? It felt like that.  I had been waiting for this day for 9 months.  I planned the crap out of it and was so ready to see it all come together.  And really, as corny as it sounds, I wasn’t nervous because after Luke and my second date I knew I didn’t want to not be with him.  So marriage was bound to happen sometime!

So anyway, corny tangent aside, here are the pictures of my beautiful bridesmaids getting ready.  Some are very goofy (sorry mom) but just wait until next week when you see how nice they look all dressed up! I am so lucky to have these ladies in my life.  

Here is the set up:

Taylor painting her nails.  How cute is she?

Missy getting her hair done by Annmarie

Sandy Lynn waiting her turn.

The best maid of honor ever being very helpful and handing Annmarie bobby pins.

Britt beautifying SL

My beautiful mother!

 Liv getting her makeup done!

Jr. Bridesmaid, Kate, getting her hair curled

Micah definitely looked the best out of all of us before hair and make up.  Look at how gorgeous she looks!


...and the lovely bride.  Stuffing my face while getting my hair done! haha

New House Projects: Kitchen Cabinets

Monday, March 23, 2015

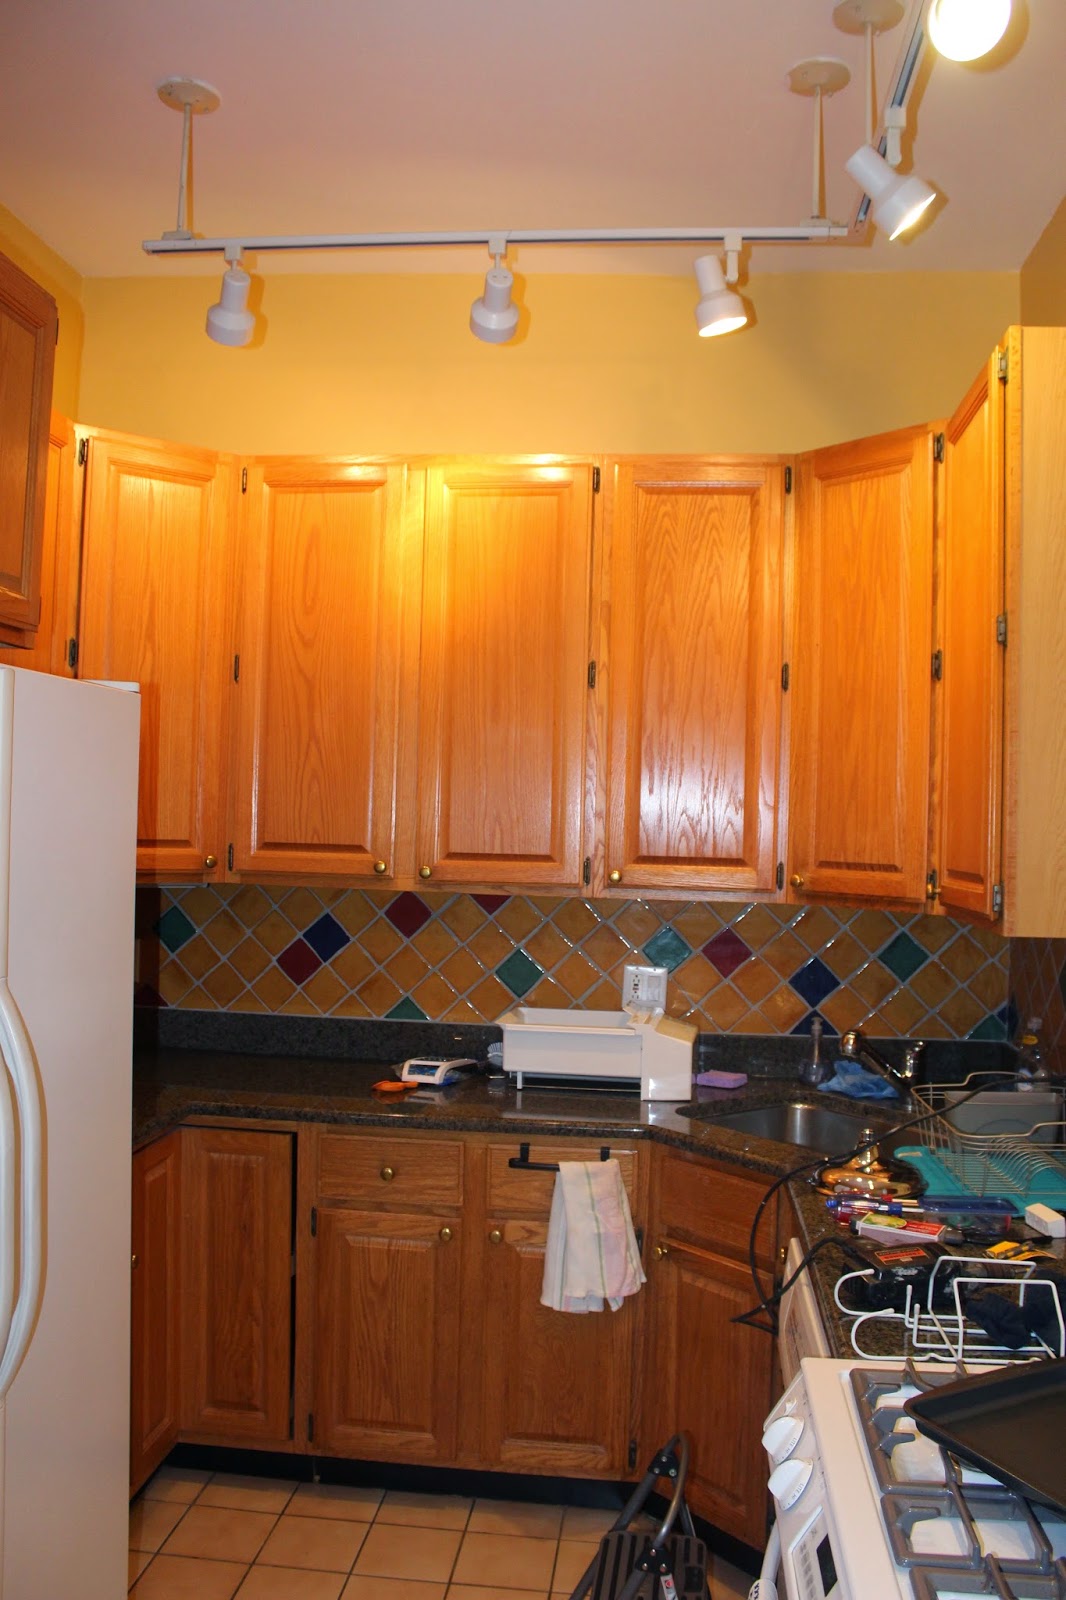
Since our furniture was going to be so delayed (2 weeks) we decided to make the best of our completely empty living and dining rooms and paint our TERRIBLE kitchen cabinets.  While I don't have anything against oak, when it is used in combination with a yellow floor, yellow walls, and yellow backsplash, it is not the best looking kitchen in the world. Here is the story of our newly painted kitchen cabinets!


Here they are before:  

We took them all down and laid them all out on the floor.  Luke took all the hardware off of them while I started sanding the part attached to the wall.  

 Here they are!  Notice the super pretty and stylish track lighting.  

After a light sanding to get the glossiness off of them, we wiped everything down really well, allowed it to dry for a couple minutes, and then primed everything.  


Then it was time to paint! We decided to do the upper cabinets a snowy white (how punny of me) and the lowers a blue gray to try to pull more blue out of the countertops than green.  We put two coats on each side of everything.  This definitely took a bit of time because of the drying time in between coats, but we got it done in about a week.  We would do one coat per night and then flip and do the other side the next night.  Luke had a blast (not really, he hates me).


Here is the finished product! How could you not love that!?  It is definitely much better than the originals and only cost about $200!  We decided to keep the old brass hardware on them to save money, and they really don’t look that bad. 


First project down, many, many more to go and I am so excited about it!  I love having projects again!  All of our stuff is also here to the kitchen is completely moved into and finished (for now). Next up (after unpacking all the boxes) is painting the walls and seeing if we can DIY knocking out the silly boxes the people put into the ceilings.

If you have any questions about painting your kitchen cabinets, let me know! I definitely learned a lot while doing these and am happy to share my wisdom ;)